Saturday, July 31, 2010

as promised, zucchini soup/balsamic glazed green beans and the perfect ear of corn

In my last entry, I made orzo with summer squash in pesto sauce. This was because Nathan does not have a blender, and I couldn't make what I had initially planned, which was this gorgeous zucchini basil soup.


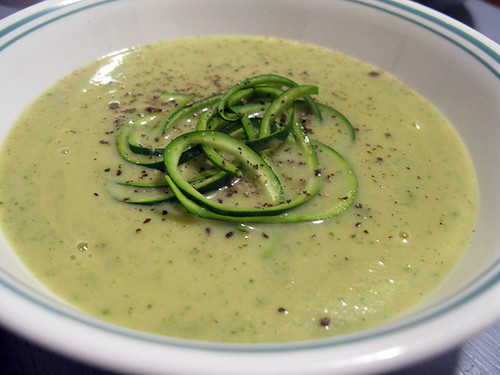
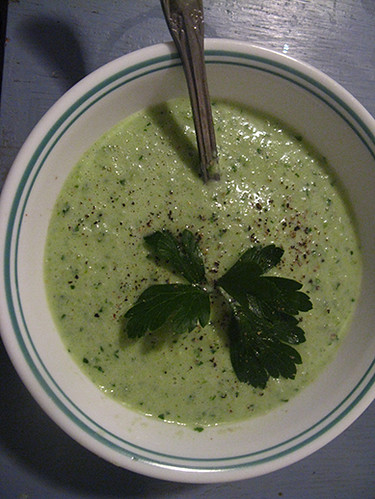
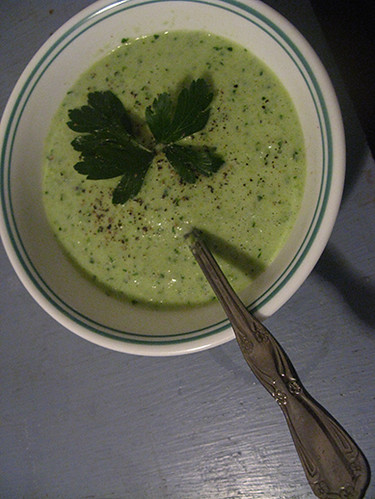
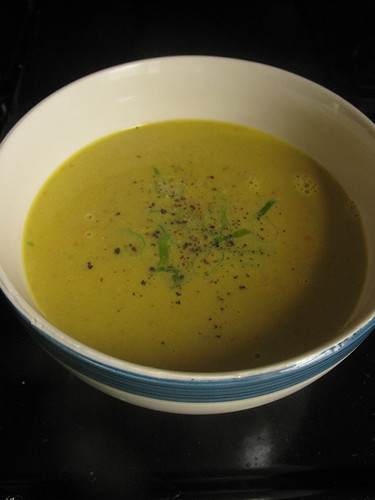
zucchini soup with basil

Originally from Gourmet, (surprise!), this soup is a snap, and totally delicious. I used two zucchini, and two yellow summer squash, plus half of one large, fresh, food co-op onion and vibrant green basil. I chopped the squash into fairly thick rounds. Then I realized I was supposed to have peeled the zucchini and julienned the skin, so I had to peel each round individually. That was a pain, so I only did the zucchini and not the summer squash. (I also figured that the green skin would be more visually striking than the yellow.)

I put the zucchini skin strips in a small colander with a spoonful of salt and let that sit while I made the soup. This is supposed to make sure the skin doesn't turn to mush when you use it to garnish the soup. It didn't, so I guess it worked.

To make the soup, I sauteed the sliced onion in olive onion until soft, and then I added the chopped squash and a teaspoon of salt. I let that cook for five minutes and then I added three cups of water and simmered for 15 minutes. Finally, I added a third a cup basil and went to town with my immersion blender. To serve I blanched the thinly sliced skin in boiling water for one minute. I added plenty of black pepper to the soup and topped it with my julienned zucchini. It was so great. The basil really added a delicious kick to what was already a delicately creamy delight. What a great summer treat! The perfect way to use up that bounty of zucchini!

I also made some green beans because I got a huge bag of them from the food co-op. I sauteed the other half of my onion, (possibly in butter or oil, but I think it was a spoonful of bacon grease), and then I added my green beans, ends trimmed and chopped in half. I stirred it all around for maybe five minutes or so, and then I added a healthy splash of balsamic vinegar. Maybe three tablespoons or so. I let that cook down for maybe ten to fifteen minutes, until it boiled away into a nice syrupy glaze and the beans were cooked through. Seasoned with salt and pepper, this was a pretty tasty side dish. Nothing I would jump at the chance to make again, but definitely not a dud either.


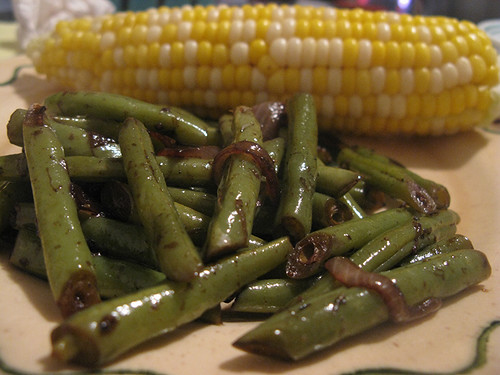
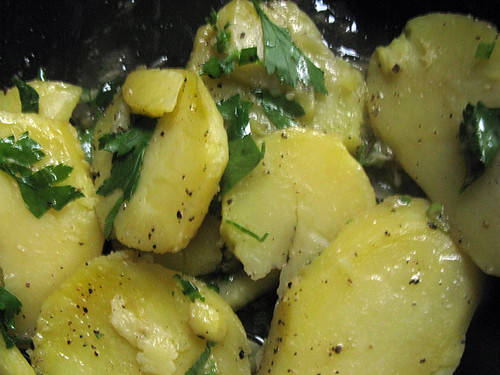
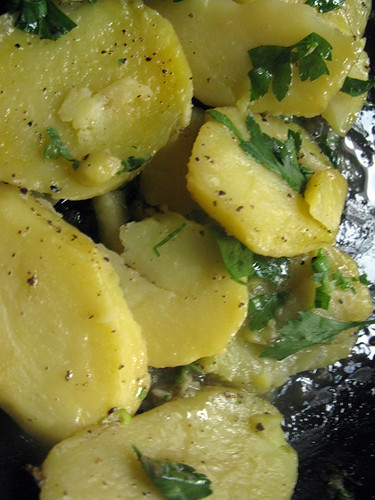
balsamic glazed green beans with onions, and the perfect ear of corn

I rounded the meal out with a perfect ear of summer corn. Where last time I tried to do too much with it, this time around I decided to let the corn stand alone, and boy did the flavor sing. I simply shucked it and dropped it into a pot of salted boiling for like 8 minutes or so. I didn't even butter it. It was so good. I hope you get to have corn this good this summer. One of us should, seeing as I can't. What a waste I am now. Never break your jaw kids.

Friday, July 30, 2010

reruns are delicious + a new twist

Today's entry features three things I have already made for you here on the blog, although one of them is a bit of a new take. That being said, all of these dishes are delicious, and I guarantee they will make you a very full and happy camper should you choose to make them!


the tried and true

Nathan and I cooked dinner over at his place last Wednesday before Top Chef and it was really great. There's a reason I've made lime cilantro coleslaw and dry rubbed ribs before— they are delicious!


orzo in pesto with yellow squash

I also gussied up some pesto sauce by serving it with orzo and summer squash sauteed with garlic and parsley in olive oil. I was initially planning on making a soup with squash, zucchini and the pesto, but I forgot to bring over my immersion blender to Nathan's so I had to improvise. If the soup sounds intriguing, you'll be pleased to know that I ended up making it a few nights later— and it was even better than I had imagined. As I learned from my makeshift orzo squash pesto dish, basil and zucchini make very good bed mates. It's a delicious combination I encourage you to try.

As for the ribs and coleslaw, I didn't really change anything this time around. I added too much salt to the coleslaw, but after an hour in the fridge, the salad mellowed, thankfully. Since we don't have a grill, we cooked the ribs in the oven at 350° for an hour. They were awesome. Bursting with flavor and nice and tender. We had plenty leftover, which made for tasty rib and coleslaw sandwiches. Mmmm.


moist and flavorful dry-rubbed ribs

I'll leave you with one last shot of glistening ribs. I'm getting hungry just thinking about them. It's going to be far too long before I can sink my teeth into a nice healthy chunk of meat. I hate my life right now.


ribs glorious ribs

Thursday, July 29, 2010

happier times and fried zucchini

So last Monday, bursting with excitement for summer vegetables and an apartment suited for dinner guests, I cooked a summer supper for Marc, Grace and Nathan. I served the previously discussed minestrone soup, maple carrots and turnips, and a salad, but the part of the meal I was most excited about was my late grandmother's fried zucchini.


my Nona's fried zucchini

Without fail, Nona would make this every time I would visit her in San Diego. My Uncle Ed and I would fight over each and every piece, and it would never make it to the dinner table. It's simple but incredibly delicious, and I did my best to recreate it. Actually, I got a lot of help from Marc and Grace, who were excellent sous chefs for our dinner. Marc peeled carrot and Grace chopped greens for the minestrone, made a salad, and sliced zucchini into long, thin strips. Together the two of them dipped the thin zucchini slices in egg, dredged them in flour, and then passed them off to me to fry in hot vegetable oil. We made a great team, and I couldn't have gotten dinner on the table so quickly without all their help. Thanks guys!

The zucchini turned out great, although Nona's would have obviously been better. The woman could do no wrong in the kitchen, and I miss her terribly. I hope she's out there somewhere, smiling to see the joy that her peerless cooking continues to give people.


fried zucchini, a salad and maple syrup glazed carrots and turnips

To round out our meal Marc brought a couple of bottles of wine, and Grace picked up some beautiful little desserts that I forgot to photograph. Their wonderful contributions really made for a festive evening. Considering the meal was almost entirely vegetarian save for chicken stock in the soup, we were all quite satiated and satisfied. This sort of thing will really be missed now that I can't eat real food or drink alcohol. :(


Marc and his sparking red wine made for two welcome guests

Wednesday, July 28, 2010

this is going to be tough

My jaw is now wired shut. It is a terrible, awful, weird feeling. I feel like I am locked in! Drinking purees is fine in theory, but it s crazy to not be able to lick my lips or use my tongue at all. Yesterday they had told me that I was going to be wired up for 5 weeks, but today they told me that they should be able to switch to rubber-bands in two week's time, which means soft foods like eggs will be ok at that point. That also means only four weeks total before my mouth is back to normal, God willing.

I feel pretty knocked out. I made ratatouille last week or over the weekend or something, so I took that home to Long Island with me. Mom came in by train yesterday and stayed over my apartment last night, and dad came and picked us up at the hospital. We stopped at Rite Aid back in Huntington and my mom picked up some protein drinks and Sensodyne toothpaste and stuff. Not the most inspiring purchases in the world.

Dad pureed my ratatouille with some water. He also made me a blueberry cantaloupe Ensure smoothie. I had put wax over all the spiky metal on my teeth, but I was still a little drugged up from the surgery when I did that, so I put too much and it was blocking the gaps and the food couldn't get through very well. It was gross. I had to clean off all the wax before I could actually eat. Not fun.

My teeth hurt, and I wish I could talk normally, but I'm glad my jaw is in place at the very least. In that regard, I definitely feel better, and I'm sure the pain killers are helping me out. I'm feeling pretty hopeless about being able to enjoy anything for the rest of the summer, but I think that I will be able to heal ok, and that this shouldn't have any lasting damage on my body. Paying for all these medical bills is another story...

Tuesday, July 27, 2010

liquid diet

Today I broke my jaw. I will be getting it wired shut tomorrow for the next five weeks. I am incredibly depressed about this, and probably won't continue blogging, since I will be drinking boring nasty purees from now until the end of August and can't imagine mustering up the necessary enthusiasm to write about them. Basically, the rest of my summer is shot to shit. I may post the few dishes I haven't written about yet, but I'm not sure what the point is.

Monday, July 26, 2010

maple carrots and turnips


maple syrup glazed carrots and turnips

Last summer, my very first food co-op share included turnips. I had never ever cooked a turnip in my life, and thus had no idea what to do with them. My friend Megan lives and runs an organic farm, (and earlier this year was blogging about it), so I asked her how she liked to cook them. The resulting recipe, rich with butter and maple syrup, was so delicious I immediately submitted it to the CSA newsletter. I admit that the combination might sound strange, but it highlights the veggie's natural sweetness and gives it a beautiful sticky sweet glaze and is just off the hook good every time I make it, which is every time I have turnips. Megan also gave me a nice method for cooking turnip tops, which I haven't made recently, but will include nonetheless. Here is my submission, first composed on 6/17/09:

A newcomer to community sponsored agriculture, I was excited to receive my first share of vegetables from Norwood. However, I have to admit I was intimidated by the selection, as I had never cooked a turnip in my life! I put out a cry for help on facebook, and a very good friend of mine, who lives on an organic farm, responded with a pair of recipes which she dubbed "the best way to eat turnips." I am not too sure on the measurements, so this is the closest approximation I can come up with.

Caramelized Maple Turnips and Carrots
6 small white turnips
2 carrots
3 or 4 tbsp real maple syrup
quarter stick of butter
1 cup stock (or enough to cover the carrots and turnips in the pan)
salt and freshly ground pepper to taste

Wash turnips and remove the greens, which can be cooked separately. Chop into small slices. Peel carrots, and slice into thin disks. Place carrots and turnips in a pot, and pour in enough stock to more or less cover them. Cook on medium high heat until carrots and turnips are almost cooked all the way through and the stock has mostly boiled off. Then add butter and syrup, and let that cook down until it gets nice and caramelized. Sprinkle with salt and pepper and serve to guests who won't mind if you lick the plate.

Braised Turnip Greens
6 turnip tops
1-2 cloves garlic thinly sliced
1 tbsp bacon grease
red wine or apple cider vinegar
salt and freshly ground pepper to taste

Wash and chop turnip greens. Peel and mince garlic. Heat bacon grease in pan over medium high heat. Add garlic and turnip greens and cook until tender. Serve with a drizzle of vinegar and a dash of salt and pepper. Enjoy!

Sunday, July 25, 2010

minestrone

As I've discussed, kale is my least favorite food co-op veggie. I never know what to do with it, and it's always disappointing to get it from the food co-op.

I volunteered for a couple hours during distribution recently, and there were actually several people there lamenting the lack of greens this season. While I was in a different co-op last year, and was not among the members who complained about getting too many greens, I had to admit that I shared their sentiment. When I explained that I never knew what to do with all that kale, one woman suggested cooking it in oil with lots of garlic, adding chicken stock, red pepper flakes, cannellini beans and pasta to make a minestrone soup. When she put it like that, it sounded pretty good!


minestrone soup

I did pretty much exactly what she told me to. I used kale and beet tops, (which made it turn pink) as my greens, and threw in some carrot rounds as well. Nathan told me that minestrone is supposed to have tomatoes in it, so I tossed in some leftover tomato sauce. Then after it had been simmering for awhile, we tasted it. Nathan was worried that the chicken broth was too bland, so I told him to add some more red pepper flakes. He did NOT stop dumping them in when I said and thus the soup was far too hot, but STILL managed to be a little bland. Not terrible, but not that great. Next time I'll use a legit recipe, or maybe just add some onions. Also, I used canned beans and Nathan convinced me not to rinse off the bean gunk. That was probably a mistake. I think the beans tasted a little funky, especially on the reheat, and I've never had that problem with canned beans that I've rinsed.


spicy minestrone topped with grated romano cheese

Saturday, July 24, 2010

breakfast!

Last weekend I made breakfast for Nathan and me:


a decadent breakfast

A poached egg with creamed swiss chard, half a toasted kaiser roll, and some steak. It was pretty filling and delicious. I had put all my half and half in my sad, watery corn soup, so I actually used some of that to cream my chard. It worked just fine, although I ended up adding just a little more than I probably should have. You can see the sauce pooling out underneath the chard in the photo.

Man, I love chard. This new food co-op has only given us chard twice all summer, which is sad and shockingly infrequent. I love the brightly colored ribs. I have a great method for cooking them that I'd love to share with you all, so I hope I get more chard soon!

Friday, July 23, 2010

glazed Gourmet potatoes and a terrible disappointment

When Gourmet Magazine folded last year, it was almost as if a little part of me died. Growing up, I think I thought Gourmet was just another picture book. My Aunt Cathy had a subscription, and I used to make her read me recipes like they were stories when I came to visit. I still can't believe that it's no longer in existence. A damn shame. Anyway, the good thing is that plenty of the magazine's recipes are available online, from one source or another. Today, I'd like to talk about a wonderful potato recipe that I made last week.


olive oil glazed potatoes with fresh parsley

The original recipe was entitled Fingerling Potatoes with Chives and Parsley, but I didn't have fingerlings, so I just used some regular ones at it worked out fine. (Actually the bag says "Golden Potatoes," if you really want to know.) I just had to slice them into long cross sections.

These potatoes literally couldn't be easier. You simply peel them, place them in the skillet and cover them with water, a couple tablespoons of olive oil and some salt and pepper. Then, you bring it to a boil, and then cover and simmer for ten minutes stirring occasionally. At that point, you take off the lid and let it cook for five more minutes, so that the olive oil sort of glazes over the potatoes. Add freshly chopped herbs, like basil and parsley, and eat immediately. I only had parsley on hand when I made it.


simple and delicious

It was delicious. Absolutely delicious. I will definitely be making this again. Normally I'll just make a baked potato if I'm having them for dinner, but this is so much faster and just plain old better. Good old Gourmet. Still coming through with amazing, fantastic food, even after being cruelly shut down.

I was lucky that those delicious potatoes turned out to be so delicious, because I majorly screwed up the main component of that meal, which was supposed to be a delightfully sweet and summery corn chowder. I was really excited about it too. I had gotten corn from the food co-op, and it was just the sweetest most delicious corn I had even tasted. I cut all the kernels off the cob and set them aside while I made a stock to base the soup on, and let me tell you, I couldn't stop nibbling. It was like candy.

I opened up The Flavor Bible to the corn entry, and in addition to learning that corn goes nicely from everything from crab to maple syrup, I was excited by the suggestions of a chef from Oregon named Vitaly Paley. He had two ideas that really spoke to me, which I will quote:

"We used the husks, which produce a juice, to make a stock for the soup... We made a stock using the corn hucks cooked with a little onion, water, and salt, and let it cook for about 45 minutes. What came out was the most amazing sweet broth. We added the corn, pureed it, and served it chilled. It was so sweet and full of corn flavor you would have sorn there were cream and sugar in it. We now make a corn husk broth to add to a corn, chanterelle, and Dungeness carb risotto with a touch of pesto. Basil pesto and corn really speaks to me. It is a wonderful combination."

You always hear that the best way to make a really sweet and delicious soup infused with bright corn flavor is to boil the cobs first, so I figured I would use the husks as well. I was convinced that this was going to be the most delicious, most flavorful, most corn-like corn soup ever. Liquid gold, if you will. I also was going to add porcini mushrooms and swirl in some of my homemade pesto. I was really excited.

What went wrong? I got the proportion of husk/cob stock to actual kernels completely wrong. Wayyyy too much water and not nearly enough corn. It was totally diluted. I tried adding some cream to thicken it up, but that didn't do much to help. It didn't taste bad, but it was just so bland compared to the glorious soup I envisioned, and the sugary sweet and farm fresh corn I had to work with. When I told Nathan, he employed one of his favorite phrases: casting your pearls before swine. It was a damn shame.

Thursday, July 22, 2010

veggie inventory

So, another Thursday has come and gone, giving me a new load of veggies to do my best to dispose of.

I cooked up some onions and green beans and corn and basil and stuff tonight, but there's still a lot left to go through, and more of it than I care to admit is a week or two old already.

4 ears of corn
3 red onions
3 yellow squash (one of them is from last week)
2 bell peppers
2 zucchini
1 eggplant
1 bag of green beans
1 head of lettuce
1 bunch of basil
1 bunch of carrots with tops
2 carrot tops (from last week. I need to make stock)
3 cucumber (last week's share)
cilantro (from last week... this really ought to be used)
1 onion (last week)
2 bunches of little beets (two and three weeks old respectively)
2 green cabbages (these are at least three weeks old)
3 scallions (at least two or three weeks old)
6 small turnips (probably like 5 weeks old...)
2 garlic scapes (these are from like, the second week of the share)
2 big beets ( I confess these are left over from winter share still. bad Sarah.)

Also I have from the grocery store:
parsley (about a quarter of a bunch)
1 bag of carrots
1 bag of celery

In terms of fruit, I pint of blueberries Nathan's grandma gave me on Tuesday, and a pint of PEACHES from the food co-op. YUM YUM YUM.

It's crazy a lot of food. I am totally overwhelmed. Overwhelmed with deliciousness, but overwhelmed nevertheless.

Wednesday, July 21, 2010

brown sugar and sesame zucchini and summer squash

Food co-op members, consider this entry my small part in our ongoing fight to consume all our summer squash and zucchini. A small but powerful weapon against excess zucchini!


sesame oil and brown sugar glazed zucchini and summer squash

My dad came up with this dish last summer when we were trying to get rid of a squash surplus. I'm facing the same mass quantities of zucchini this year, so when I remembered this dish, I had to make it. I had tried once before, but ended up switching gears midway through and wound up with an overly salty stir fry of sorts. This time, I committed to the brown sugar and sesame, and was much more satisfied.

There really isn't much to this dish. Slice the zucchini and squash into thin rounds, drizzle with sesame oil and brown sugar, season with salt and pepper, and bake until soft. You can also add a little butter, but I forgot to and did not miss it. This may be simple, but it's a nice tasty side dish, and it's certainly a bit out of the ordinary. I make mine in the toaster oven to avoid heating up my whole kitchen, but it would obviously work in the real deal as well.

I don't really have much to add, except to say that this might be even better if you tossed the squash and other ingredients in a bowl to get full and even coverage. Sesame oil is very strong, so a little goes a long way, but you have to spread it around. One small drop is all each round needs to give the dish a pleasant sesame taste.

Tuesday, July 20, 2010

chilled cucumber soup


chilled cucumber soup

After my huge pot of borscht, I am a big fan of the cold soup. It is cool and refreshing and filling; the perfect thing for the oppressive heat wave that has kept wrapped New York in its hot little hands for all of this month.

This cucumber soup came about after one of our recent CSA shares included three cucumbers of tremendous proportions. I'm generally not crazy about cucumbers, but I liked the idea of turning them into a light, chilled, creamy soup.

I very loosely adapted my soup from this Emeril Lagasse recipe. I had my three gigandor cukes, a large fresh food co-op onion, a scallion, and a sizable handful each of parsley and cilantro. I chopped that stuff coarsely, and then threw it in the blender. I was worried about pureeing all that food, but I needn't have been. This was really easy to make because Laura's parents bought her an incredibly kick ass blender for Christmas. It pureed everything to perfection. I barely had to chop anything at all; it was great.


cucumber soup with a sprig of parsley

Then I scooped in about half a container of sour cream and probably an equal amount of plain yogurt. For spice I added a fair amount of salt and pepper, some of my cucumber dill mix, dried chili powder, cumin, garlic powder and I think oregano. For acidity, I put in the juice of half a lemon, although I'm sure lime would be awesome too. I blended again to combine, and then ate it right away. All the ingredients save the spices were straight from the fridge, so it was reasonably cold to start with. It was more chilled after a night in the fridge, and the flavors stronger and brighter, but it was good immediately after its tumultuous journey through the blender, served with a juicy steak and white rice.


a cool and refreshing summer meal

Speaking of cucumbers, I'm finding they have a fairly short shelf life. In general, I haven't had to toss much of my food co-op veggies out. I mean, sure, when I'm eating salad or greens in the later part of the week, some of them will be a little bruised or wilted, but only the worst of them get tossed in the trash. So far, I've wasted very little of my produce, but cucumbers have been the exception. I've had a couple of them turn to absolute mush in a plastic bag in the fridge. Any storage tips? Or exciting recipes that I will want to make immediately, thus avoiding the problem altogether?

Monday, July 19, 2010

beet top fried rice


ginger fried rice with beet tops and a fried egg

This is definitely one of those meals you make just to get rid of excess produce, so unless you've got an excessive amount of beet tops in your fridge, I doubt you'll want to replicate this at home. However, it was still damn tasty and fried rice is always easy and delicious.

I've covered fried rice a couple of times before, and aside from the addition of the beet tops, this dish was very similar to its previous incarnations.

I start with minced garlic and ginger, and crisp that up in some hot vegetable oil. Then I sautee whatever mix ins I am using— beet tops in this case, but that could very easily be mushrooms or pork or scrambled egg or even just frizzled scallions, (or leeks, as the Marc Bittman original called for).

In this instance, I kept the garlic and ginger in the pan and added my chopped beet tops, which were dripping wet from just having been washed. I let them get nice and wilty, and then I emptied the pan. I added more vegetable oil, and cooked the leftover rice until it got sticky. A dash of soy sauce, a splash of sesame oil, mixed to combine, and then add back in the greens, garlic and ginger. Topped with a fried egg, it was a typically yummy fried rice. The stems of the beets did start to turn things pink, which was funny and cool, but other than that it was fairly standard.


fried rice with beet tops

Sunday, July 18, 2010

sugar snap pea and carrot soup


sugar snap pea and carrot soup

So, with this post, I'll have reached the end of sugar snap pea season. It was definitely a good experience, and opened my eyes to the joy of farm fresh peas. My last week of peas sat in the fridge longer than they should have, so I figured making them into a nice soup would be good, since they were no longer as sweet.

On a tip from Tenli, Nathan's mom, I shelled my peas and then sauteed the pods in butter. Then I added some water and let that boil away to make a nice broth. I strained out the pods, and was going to discard them, but they were actually surprisingly tasty, so I decided to incorporate them into my soup after all. This turned out to be a good decision since it imparted further pea flavor and it helped keep the soup from being too watery.

Meanwhile, I had sliced up some onion and carrots, and got those cooking in a little more butter. Once I had my pea broth, I added that and some frozen chicken stock, and let that all cook together. Then came the peas. Once everything was nice and soft, I added the pods back in and went to town with the immersion blender.

This only made two or three cups of soup, (it was only a pint of peas), but once properly seasoned, it was delicious. Sweet but hearty, it was a simple and successful meal. Topped with sliced scallions and paired with bread and butter, it was SO GOOD. Pea soup is always the best, isn't it? Will have to make split pea soup in the winter.


a summery soup of peas and carrots

Saturday, July 17, 2010

mac and cheese take three


As promised, I welcomed Nathan home from Italy with that all-American classic, macaroni and cheese. I know I've covered this before, not just once but twice, but you know what they say. Third time's a charm. Also, while the repetition may bore the three readers we have, it's good for me just to keep a record. Plus, it doesn't hurt that this may have been the most intensely delicious mac and cheese I've made yet.


A rich, creamy bechamel sauce loaded with butter, flour, half and half and parmesan cheese. Having tried milk last time around, I have to say that it comes out so much creamier if you splurge on half and half. It really improves the dish.


Sweet Italian sausage sauteed with half and onion and a garlic clove left over from the chicken parm's tomato sauce. Then add a tiny jar of olive oil marinated artichoke hearts. Sautee and toss with pasta, bechamel sauce, and plenty of sliced basil for extra Italian flair and flavor.


A whole pound of mozarella cheese and a quarter pound of cheddar shredded and melted between layers of bechamel laden pasta shells. Dare I say this was almost too cheesy? Don't worry, I said almost.


A crispy topping of breadcrumbs grated from an old loaf of Arthur Avenue bread in the freezer. Extra romano cheese on top.


A triumph of artery clogging proportions. What my boy wants, my boy gets.

Friday, July 16, 2010

oreo cheesecake


roman style broccoli

This post is pretty much dinner for Paul Part III, (Part I being chicken parm and Part II being broccoli strascinati). For dessert that night, I made an Oreo cheesecake.

I love Oreos, so awhile back I bought one of those jumbo jumbo packs from BJ's that is designed to feed 30 third graders or whatever. Needless to say, it was more Oreos than I knew what to do with. Therefore, I was thrilled when I came across this recipe for cookies and cream cheesecake bars.

I ended up scaling down a little because I had some cream cheese, and bought some more, and then came home to discover that the stuff I had in my fridge had gone bad. Whoops. I wasn't about to go back out, so I simply regrouped and made do with 2 things of creamcheese instead of three, reducing the amount of other ingredients accordingly.

I ground up one roll of Oreos in the blender, and then mixed them with three tablespoons of melted butter. I pressed this mixture into the bottom of my tart pan. The recipe called for baking this crust, but I've made similar crumb and butter crusts in the past, and none of them required any baking. Therefore, I decided it was totally unnecessary and I skipped it.

Then I beat two bricks of room temperature cream cheese and half a cup sugar with my electric mixer. Once that was nice and blended, I added half a cup sour cream, ¾ teaspoon vanilla and mixed that all up. Then I added two large eggs, one at a time, and then made sure that everything was neatly combined. Then I took half of a roll of oreos and blended them really quickly, so they were still nice and chunky, and stirred that into the filling. Pour into the pan on top of your oreo crust, bake for 40 minutes at 325 degrees, refrigerate overnight and voila! You're done!

It was pretty tasty, but I think it needed more sugar, actually. It tasted more like cream cheese and less like cookies and cream or cheesecake. I wouldn't rule out that I ultimately used less than a half cup sugar, because I tend to cut back on sugar when baking. However, it definitely could have been sweeter. It was tasty enough, (I mean Oreos and cheesecake! come on!), but I think that there are probably better variations on this theme out there.

Thanks to Paul for the pictures! Have a good weekend everybody!

Thursday, July 15, 2010

broccoli strascinati


roman style broccoli

Remember when I talked about making pork chops agrodolce and peperonata from Saveur's Roman Food issue? Well, another dish in the magazine that caught my eye was broccoli strascinati. The concept is simple: broccoli cooked in a frying pan at medium high heat with olive oil, garlic and red pepper flakes. I really like broccoli, and I think it's especially good when the edges start to brown even as the rest of the floret stays bright green, so I was excited to try cooking it this way.

Nathan, however, hates broccoli, which means that in the two years we've been dating, I've cooked it only a handful of times. This is sad. Growing up, broccoli had a prime spot in our veggie rotation, usually steamed and sprinkled with lemon juice and grated cheese. If it wasn't for Nathan, I know it would remain among my go-to vegetables. As it is, I miss broccoli, so when Boyfriend went off to Italy without me, what else could I do but cook a Roman broccoli dish?

When I made dinner for Paul, I had just gotten three small heads of broccoli from the food co-op. When I started thinking about side dishes for chicken parmigiana, this recipe immediately popped into my head. I got hungry just thinking about it: crispy, crunchy, slightly charred broccoli with fragrant garlic and olive oil and a hint of spice from the red pepper flakes. I'm used to hearing from Nathan about how awful broccoli is, so I was worried that Paul and company wouldn't like it. Then I remembered that Paul's second favorite dish after chicken parm is chicken with broccoli, and that he has long dreamed of combining the two into one super dish. We were golden.

I cut the broccoli up into little florets. I also peeled the stem and chopped that up, so as to not waste anything, but I think I could have peeled a little more liberally, as I got some very chewy stringy stems at points. Then I smashed and sliced a few garlic cloves. From there, the recipe is sinfully simple.

Heat olive oil in a skillet over medium-high heat. When the oil is hot, add the broccoli and let that start to brown, turning it periodically, for 6 to 8 minutes. Then you add just a little bit of water, the garlic and the red pepper flakes and cook for a few minutes more, until the garlic starts to brown. Season with salt and pepper, and you've got an easy and super delicious vegetable side dish. It's so good I suspect even Nathan would like it.

As for Paul, this was probably the closest he's ever going to get to his hybrid chicken parm/chicken with broccoli dinner. While I'm happy to cater to a friend's personal tastes, I don't think I'm ever going to mess with parmigiana soy sauce fusion. Sorry Pablo.

Stay tuned for our dessert!

Wednesday, July 14, 2010

chicken parmigiana


my chicken parm with broccoli, pesto and sourdough bread

So one of my best friends, Paul, moved into the city last month, and I promised to bring over dinner as a housewarming present. Paul's favorite food is chicken parm, so the menu was a total no brainer. I figured I'd also bring a salad, because I'm always struggling not to waste my food co-op lettuce. Then, while making borchst, I accidentally defrosted a container of pesto I assumed was chicken stock, so we had that too. It was pretty discolored after its time in the freezer. Not pretty. I also made an oreo cheesecake and broccoli strascinati, but I am aiming to make an entry every day for the month of July, so I am going to stretch this meal across three posts.

First, I made Marcella Hazan's famous tomato sauce, which I previously blogged about here. The recipe calls for only canned tomatoes, butter, and an onion. But I of course could not help embellishing, tossing in a garlic clove and finishing it off with plenty of fresh basil and parsley from my food co-op stores. I cooked this in too small a pot, because I didn't want to use the giant one, which meant tomato splattering everywhere and the onion and garlic didn't get as delicious soft and saturated with tomatoey goodness as the last time, so I had to remove them from the sauce rather than smashing them into it. Luckily, it still tasted good, and I saved the onion and garlic to use again on a later date.

Since there were going to be three ravenous young men at dinner, I bought six chicken breasts and boned them myself. This means that I've now got six bones in the fridge waiting for me to cook up some stock, but that is a story for later. I sliced my cutlets thinly and then dipped them in egg and seasoned breadcrumbs and pan fried them in hot vegetable oil. I did all this the night before so that I could serve a reasonably early dinner to Paul, his girlfriend Lauren and his roommates, Rob and Andrew. I also cut up the broccoli, and made the cheesecake. Lots and lots of prep work.

The next day I came home after work and packed up everything and hopped on the subway down to Paul's house. He picked up some bread to go with dinner, his roommate Andrew had some red wine, and Lauren bought some shredded mozzarella. I had already put the cutlets and sauce in a baking dish, so when I arrived I simply topped them with the cheese and popped them in the oven and got to work on the broccoli and salad.

After twenty minutes, I switched on the broiler and let the cheese get a little brown and bubbly. The chicken was a delicious saucy, cheesy mess.


chicken parmigiana with plenty of cheese and sauce

Andrew recently bought a gigantically awesome patio table for their roof, so we took the food upstairs and ate under the stars. It was awesome. I am so envious of their sweet roof set up, although I suppose I could technically set up something of the sort on mine, which is unlocked. Maybe someday.

Tuesday, July 13, 2010

Spinach Lasagna

Sarah is churlish and always whines about how she doesn't like lasagna, but I think it is great. Lasagna is one of the few foods that I don't think really benefits from meat, it's that good. Normally I would say that you could add meat to pretty much anything and it would make it better, even possibly ice cream. Even though they look good on paper, meat lasagnas never really seem to stack up to this recipe. Even Sarah admits that it is pretty good.


This recipe uses the following ingredients:

1 lb ricotta
1 1/2 c shredded mozzarella, divided into 1 c and 1/2 c
1 egg
1 10 oz package frozen chopped spinach, thawed and drained
3/4 tsp oregano
1/8 tsp black pepper
1 jar tomato sauce
8 oz lasagne noodles

Yeah that's right, a jar of tomato sauce and some frozen chopped spinach, you organic pansies. The haters may hate but using these ingredients saves plenty of time/effort and I challenge you to taste the difference, especially in a situation like this where the spinach isn't exactly center stage. You guys have fun wilting and chopping your spinach and I'll be already done cooking, sitting back, just lounging and watching COPS or some shit.

Anyway, preheat the oven to 350, and mix the ricotta, 1 cup of the mozzarella, the egg, the spinach, the oregano, and the pepper in a bowl. This tastes great on its own and would make a good dip if it weren't for the raw egg. Get one of those glass 9 by 13 baking pans and grease it with some cooking spray (ooohhhh shiiiit he's using cooking spray, waah waaah whatever whiners). Then begin layering. First put half a cup of sauce, then a third of the noodles, then half the cheese mixture. Then do that again. Then put the last of the noodles, whatever is left of the sauce, and the remaining half cup of mozzarella.

Now comes the most important part. Notice that I didn't boil the noodles. This is because boiling them is unnecessary - they will cook fine in the oven as long as you add water at this stage. Using the empty sauce jar as your vessel (this way the water becomes sort of saucy), pour water around the edges of the lasagna assembly, about a cup or two. Then cover the pan tightly with foil (you might want to spray the underside to prevent it from sticking). Bake for 75 minutes and let stand for as long as you can hold yourself back - in my case maybe 5 minutes but ideally like 10 or more.

There you have it, some delicious lasagna. I've had some minor issues with the bottom noodle getting a little overcooked and chewy, but nothing major. The most recent time I made this I added a lot more water and the problem was lessened. Maybe I need more sauce on the bottom? Who knows.

As I was writing this an idea struck me - what if instead of making a pure meat lasagna, I took this already successful recipe and added meat to it? I could put some pancetta in this thing or bacon, or perhaps replace the noodles with thick-cut bacon?!?! Maybe I will try this and report back.


Monday, July 12, 2010

the over-stocked fridge

Yesterday, Laura and I both cooked our own veggie-centric dinners in an attempt to get through our surplus of food co-op goodies. Between the two of us, we definitely made a dent in our produce supply, but there is still a considerable amount of food we need to use, and most of it doesn't have a very long shelf life.

It's especially tricky because almost all of it is stored in opaque plastic bags, which makes it hard to keep track of what we've got at any given time. Each week, there's a new supply, and I'm afraid we generally don't finish everything up before the next delivery. In order to better keep track of everything and how old it all is, I've decided to put an inventory on the fridge door, and date things.

As of tonight, we have two bunches of small beets, half of the beet tops, 2 giant beets left over from the winter share, half a red cabbage, two green cabbages, 3½ zucchinis, 4 yellow summer squash, 2 onions, a bag of scallions, a bunch of chard, a bunch of kale, half a bag mixed lettuce, two bunches of turnips, 2 garlic scapes, a little basil, and that's just the food co-op stuff. There's also carrots, celery, and half a bunch of parsley.

The fridge is fit to burst, with the crisper drawers filled to the brim and the bottom shelf is also piled with vegetables.


our full full fridge

As you can probably imagine, it's pretty daunting. If any of those ingredients particularly speak to you, please feel free to share recipe ideas with us. On Wednesday I think I'm going to make a maple turnip carrot recipe that my friend Megan gave me last year, but I'm definitely looking for other ideas.

Sunday, July 11, 2010

I scream, you scream, from California to the New York Islands

Note from Sarah: Today's entry is a guest blog by Nathan's mom, Tenli. She posted some absolutely mouthwatering photos of homemade ice cream on facebook earlier, and I was so impressed. Even though lots of food blogs frequently feature ice cream making, it still seems like an impossibly daunting proposition to me. I was so impressed with her blackberry ice cream that I insisted Tenli post a guest blog entry explaining the process. I hope you all enjoy it as much as I did!


Nathan's brother Weston, age 15, is an avid and creative cook, particularly skilled in the dessert area. He and I had been searching for a cooking class to take together since his birthday in October. Last weekend, we finally had our chance: Ice Cream 101 at Sur La Table in San Francisco. In the hands on class, we were introduced to the concept of "French style" ice creams, which are custard based. Weston and I participated enthusiastically in class, making four different kinds of ice cream, as well as chocolate and strawberry sauces, and of course eating them all. We came home to Oakland with the recipes from our class, a gorgeous red Cuisinart ice cream machine, and "The Perfect Scoop" by David Lebovitz. The next morning, as I stumbled around the house still logey from my ice cream hangover, it came to me: "Hair of the dog!" Off I went to get the ingredients for my first solo batch of Lemon Curd - Blackberry Swirl Ice Cream with Blackberry Sauce.

Our teacher, Sara Lodick, reminded us at the start that the best ice cream is made from the best and freshest ingredients, and, with that in mind, I splurged on Strauss Family Creamery organic dairy products from Marshall, California. The lemons and blackberries came from the local Sunday farmer's market. Pretty much everything else was already in my pantry, and I was good to go.


For the blackberry swirl part of the ice cream, I began by boiling the berries, sugar, lemon juice, and a small amount of light corn syrup in a small saucepan until they generated a fairly thick, deep purple sauce. I strained the liquid and set it to chill while I prepared the lemon ice cream. In a larger saucepan, I combined cream, milk, and sugar with some extra special vanilla extract from Mexico, and just barely scalded the mixture, turning off the heat when the merest hint of a skin formed on the surface of the liquid. In a metal bowl, I whisked together eight egg yolks with 3/4 cup of sugar, then added lemon juice and grated lemon peel. Finally, I combined the two mixtures together, slowly adding the liquid to the egg mixture with a ladle so as not to curdle the ggs. (I really missed Weston at this point -- ideally, this would be a two person operation.) Next, I put the metal bowl over a double boiler and stirred it over boiling water until it began to thicken. I fed the custard base through a strainer, and put the strained custard over a bowl of ice to chill quickly, then put it in the fridge to cool down further. The recipe said to cover and refrigerate overnight -- but in class, we did it in a couple of hours, so I knew it would be fine if I rushed things a bit!

While the custard was cooling its heels, I combined blackberries, more sugar, and more lemon juice in a bowl and let them stand for an hour or two, stirring every now and then. Over time, the lemon juice and sugar broke down the berries into a distillation of pure blackberry sweetness that would later be the sauce for our dessert.

Later that day, while eating a delicious grilled dinner out in the garden, the ice cream maker did all the work of turning my custard into fabulous lemony ice cream, which I then layered in a loaf pan with the blackberry swirl mixture, and returned to the freezer for another hour or so. Scooping into the layers produced a mouthwatering swirl of pale lemon and purple blackberry which was then drizzled with indigo sauce and a couple of ultra sweet blackberries. When we finally got to eat dessert, there were moans of pleasure all around.

- Guest entry by Tenli, Nathan's Mom. Thanks to Sarah for inviting me to share this experience.

Saturday, July 10, 2010

borscht


beet and cabbage soup

In my ongoing attempt to get rid of my food co-op beets, I made borscht. This is easy, and tastes pretty good. I had made a borscht last summer too, but I didn't remember which recipe I used, so I started my search afresh.

I found this great website about supporting Ukrainian orphans that looks like it is straight out of 1997 and has a whole section devoted to the world's best borscht. I explored their collection of recipes, and got a pretty good sense of what I wanted to do: Beets, cabbage, carrots, celery, onion, potato, parsley and dill. The ingredients varied from recipe to recipe, but those were the most common across the board.

I started off with the mire poix of carrots, celery and onion. I had saved the water that I boiled my syrian beets in, so I poured all that in after everything had started to brown. I would have added some chicken stock also, but I accidentally defrosted pesto sauce instead, and started to add that instead before I realized my mistake. Near disaster! Haha. Then I added half a head of cabbage, a small bunch of chopped parsley, some minced dill and a handful of small red diced potatoes. I let that all cook for a while and then I added three GIANT peeled and diced beets.

I cooked that all for long while more and then tried to mash it all up a bit since there wasn't much liquid. It was pretty chunky, but when I tasted it, it was good. It's common knowledge that soups are better after a day or two when the flavors have had a chance to meld, and borscht is no exception. Two days later, topped with dill flavored sour cream, thinly sliced radishes, scallions and fresh dill, it was a delicious meal.

I still think beets are kind of boring, but making them into a hearty borscht is not only tasty, but a cool refreshing lunch for the dog days of summer.


borscht topped with radishes, dill and scallions

Friday, July 9, 2010

fried soft shell crab with rice and creamed kale


crispy soft shell crab

One food blog that I really admire is Caviar and Codfish. I found it back in late March, whilst trying to find the recipe for The Red Cat's phenomenal bacon chard pie. While I never did find that recipe, I've been following Robin's postings at Caviar and Codfish on and off ever since. The pictures are absolutely beautiful and the food always sounds amazing. Two of her more recent entries involve soft shell crab, something I like but would never thought of cooking myself.

Fast forward to late June. My dad and I are in Harlem, enjoying some quality father-daughter bonding time. As we walk down 125th st to Dinosaur BBQ, we pass specialty grocery store Citarella, and my eye is drawn to a sign proclaiming, "we have soft shell crab!"

Two days later, with Nathan away in Italy, I decide to skip my usual Tuesday movie night and try some soft shell crab. At $5.99 a piece, they aren't particularly cheap, but since it's just me, I only need one. Cooking the crab is incredibly easy. I dredge it in a mixture of salt and pepper, flour and a little cornmeal and pan fry it in hot melted butter for three minutes on each side.

As for the accompaniments, I decide to make some rice and follow Robin's lead and serve my crab with creamed spinach. However, I've got no spinach. What I do have is kale. Kale that has been sitting in my fridge taunting me for weeks. It's getting yellower and yellower, and I know if I don't eat it soon, it will die out of spite. Maybe, instead of the spinach, I could cream kale? First google hit: Bobby Flay. This could be just crazy enough to work...

I dice a shallot and cook it in melted butter until it is nice and soft. Then I add a spoonful or two of flour, and stir that around for a few minutes. Then I pour in some cream, and let that thicken as I stir it. A few sprinkles of nutmeg, and I am really to add my steamed chopped kale. I mix it all together, season with salt and pepper, and it's ready to go. But how does it taste?

AHA! I have discovered a way to cook kale that I actually like! Of course, a load of butter and cream will make most things taste ok, but still. Maybe I'm starting to come around on kale. I think the reason I find kale so off putting is that it really doesn't look like a vegetable. It looks like vegetation. And sure enough, there are varieties of kale that are purely ornamental. Something about the thick stems seems woody, although I suppose they aren't really so bad. If I treat kale like I would spinach or chard, maybe I'll like it more. Maybe we can even be friends.

And how was the crab, you ask? Pretty much awesome. It was crispy and yummy and wow soft shell crab is good. There was ONE thing I thought was weird though. You're supposed to clean soft shell crab by cutting off the eyes and the top of the head and emptying out the organs, or whatever. The fish dudes at Citarella said they would do this for me, and they certainly were off in the back doing something with it before they wrapped it up for me to take home. However, when I cut into my crab, a huge amount of light green liquid oozed out of the head, seeping into my kale and rice. I was worried that they didn't clean it properly, or that I didn't cook it long enough, but the flesh was all very white and firm, so I just ate it, goo and all. It was delicious, if unsightly. I asked Robin if this was normal, and she wrote back said it was just tomalley and internal fat, akin to the green goo you find in lobsters. I was glad to know there was nothing amiss with my dish, and learned a bit about crabs to boot!


creamed kale over rice with a soft shell crab

Thursday, July 8, 2010

ravioli with swiss chard, sugar snap peas and garlic chips/radish salad sandwich


ravioli with chard, sugar snap peas and fried garlic chips

So last Monday night when Nathan left for vacation in Italy, I decided to cook up some Borgatti ravioli. I had had a box in the freezer since I was last up on Arthur Ave the last weekend of April, but I was waiting for a special occasion to break it out. I guess I was feeling like if I couldn't go back to Italy, I could at least eat the best ravioli this side of Atlantic. The time was right. (Appropriately, Nathan actually gets back TODAY, and I am so excited!!!)

As I was leaving work, I stumbled across this recipe for spaghetti with swiss chard, olives and garlic chips. I had seen it before, but it hadn't particularly struck me at the time. However, with a bag full of chard slowly wilting back at home, it suddenly seemed much more appealing. So, when I got home, I dug into a fridge full of vegetables and used that recipe as a jumping off point for my dinner.

Obviously, I switched the pasta from spaghetti to ravioli, but other than that I followed the recipe fairly closely, with one notable exception. I've never really liked olives. Lately, I've been coming around on them somewhat, but I still usually avoid them. I definitely don't keep them in the house, and I didn't go out shopping, so they got axed from the recipe.

I sliced the garlic into thin chips and fried it in hot olive oil until golden brown. I removed the garlic from the pan, and added a diced shallot, which I cooked until soft. Then I added a pint of shelled sugar snap peas, (after almost five days in the fridge, the pods were truly sad looking), and then the chopped leaves of a bunch of chard. (I reserved the stems for use in a dish Nathan likes to call chard surprise, but I'll be saving that for another post.) Meanwhile, I boiled my ravioli in a pot of salted water until it floated. Once the chard was wilted and the pasta drained, I tossed it all together and added back in the garlic chips. Yummy!


ravioli with veggies and open faced salad sandwich

I also had some old Italian bread in the fridge, the end of a head of food co-op lettuce, not to mention that never ending bag of radishes. I toasted the bread with some butter so it would taste less stale, and then just topped it with thinly sliced radish, the red leaf lettuce, kosher salt, fresh cracked pepper and a drizzle of olive oil and red wine vinegar. It wasn't as extraordinary as my last radish sandwich, but it was quick and easy and helped me use up some of the food I have in the fridge. (If you too have a surfeit of radishes, you can simplify this even further and just eat them sliced with butter, salt and pepper. That's how I finally finished mine off.)


radish and red leaf lettuce salad on Italian bread

So that was that. Dinner without my boy. Inclusion of peas aside, I think he would have liked it. That being said, for those of you keeping track this type of dinner is getting to be bit of a standard in my kitchen. Olive oil, garlic, onion, cooked greens, an extra veggie and some pasta... It's getting a bit formulaic, and I'm wary of falling into a rut. That being said, when there are so many greens to use up, there's only so much you can do with them. If anyone has any especially interesting suggestions, please pass them along!

What I did particularly like about this recipe that made it stand out from the pack was the crispy fried garlic slices. If you too are intrigued by the idea of garlic chips, I also happened upon this post which a couple of other interesting ideas for crunchy fried garnishes. I use a lot of browned garlic in my cooking, but it's generally more finely chopped and serves more as additional flavoring than as stand alone element of a dish. I'm intrigued by exploring this idea of crispy little garnishes and what not. In my first post of the year, I mentioned a dinner that Nathan and I made that included blue steak, creamed spinach and a poached egg with crispy onions. This we did accidentally, but I ended up really liking it. This other blogger's post has got me thinking that there could really be something to this flavorful crispy thing!

Wednesday, July 7, 2010

syrian beet salad

So while there are many wonderful things about having a food co-op share, it can be a bit rough at times. The amount of vegetables can be simply overwhelming, and all too often something beautiful and fresh wilts and rots before you can use it. Very sad. This is even more likely to happen if the veggie in question is not something you are particularly familiar with or even like. For instance, neither Laura nor Nathan nor I can ever seem to muster up any enthusiasm for beets. I don't hate them, but they're just not something I generally cook with. I have no idea what to do with them.

Luckily, beets can stay for months in the refrigerator and reemerge little worse for the wear. Last season, I honestly did my best with the beets. I pickled them, I made borchst, I roasted them with sage for Thanksgiving dinner... but by the time winter rolled around, I was burnt out on beets. While I don't dislike them, persay, they really do very little for me, and I was flat out of ideas and inspiration. Judging by the fact that we've had two big bags of them in the crisper since at least February, I think it's safe to say that Laura feels the same way. My apologies to Dwight Schrute, but I think I've had enough of nature's candy.

However, with the summer CSA season now in full swing, I started to feel pretty bad about the winter veggies taking up room in the fridge, and resolved to remedy the situation. Enter A Bushel of What?, a fabulous blog detailing one woman's attempts to use up all the strange produce she gets from her food co-op. It's interesting reading, it's got good recipes, and she's got plenty ideas for using stuff like beets and kale, vegetables that generally stump me. Basically, it's a god send.

One of the recipes Nicole posted was for a Syrian beet salad. I liked the idea of jazzing up with beets with cilantro and scallion, and I had gotten both of those in my summer share, so I was excited to try it.


syrian beet salad

I halved my beets, (they were tiny), and boiled them for ten minutes. Then I peeled them simply by pushing at the now-softened skin with my fingertips. I smashed up a small clove of garlic, sliced up half a scallion, and chopped up my cilantro. I tossed all this with salt, pepper, olive oil and a generous squeeze of lemon juice. As instructed, I let this sit for a half an hour so that the flavors would meld.

It was good, but it still didn't blow me away. I was happy to taste the bolder flavors of the lemon, garlic, scallions and cilantro, but the beets were still a little bland. I suppose it could be that they were so old, but I think it's also just a matter of personal taste. Beets, in my opinion, are just alright. I doubt I'll ever be a true beet enthusiast. That being said, if you are, then you should give this recipe a shot. It's definitely an unusual and tasty take on the vegetable.

Tuesday, July 6, 2010

gnocchi with pan fried radishes and turnip tops


gnocchi with radishes

So remember when Nathan and I made Jody Adam's disastrous gnocchi in cream sauce? Well, even if you don't, I've had nightmares enough for the both of us. They were soggy, leaden, doughy lumps that sat in our stomachs like cannon balls. An undisputed utter failure.

Well, believe it or not, we had uncooked gnocchi leftover which I actually froze and saved, and I was recently brave enough to defrost them and try again. Nathan told me to just throw them away and not suffer through the awfulness yet again, but I hate to waste food, and I suspected they might be slightly better if I were to pan fry them to a crisp golden brown. (This smitten kitchen posts assures us that after pan frying we will never boil again.)

The verdict? Browning made all the difference! They still weren't super amazing or great, but they were actually quite palatable, and much lighter than the cream laden ones we had cooked the first time around. I'm sure I could improve with practice, but I think the first batch went so badly wrong because we used too much cream and didn't reduce it enough, not because of any fatal flaws in the gnocchi itself. Somewhat of a comfort.

Of course, I had to go and overload the cast iron skillet by about 5 or 6 gnocchi, making it nearly impossible to flip the little dudes without smushing them together. Typical move on my part. Luckily, I still got them all to brown, and if a couple of them joined together to form conjoined twin super gnocchi, it had very little impact on the final flavor.

As for the gnocchi accompaniments, I was inspired by my surplus of radishes and starting-to-yellow turnip tops. I happened across a New York Times article and recipe that sang the praises of cooked radishes, and I was immediately all about it. You can only slice so many of those things and throw them in salads.

I quartered my (surprisingly large) radishes and set them face down in a hot oil pan and just let them brown for about three minutes. After they started to color, I added some finely chopped garlic and stirred it all around for a bit. Then I added the chopped green tops of two bunches of turnips, mixing them around until they all began to wilt. After the tops were cooked through, I added the golden brown gnocchi back into the pan and sprinkled with shredded parmesan. It was all actually pretty good. Cooked radishes are damn tasty, and when it comes to gnocchi, pan frying is definitely an appealing option.


homemade gnocchi: better pan fried

Monday, July 5, 2010

coffee marinated pork chops


coffee marinated pork chop with food co-op pesto and salad

So I found this recipe for pork chops marinated in Manhattan Special Coffee Soda in the Yelp talk threads. I once went out to lunch at Tino's on Arthur Ave with my friend Kevin and decided to try the Manhattan Special Coffee Soda. I thought it was pretty disgusting, but then again I don't like coffee or soda, so I am probably not the best judge of the product. I do like many coffee flavored things, and I actually tried some coffee flavored steak at this Greek place in Astoria earlier this year that was absolutely delicious. Therefore, a coffee marinated pork chop sounded pretty good to me, so I decided to take up the recipe's suggestion of plain old coffee as a replacement for the espresso soda.

Of course, to marinate anything in coffee, you first have to brew it. To most people this is probably second nature, but aside from occasionally running the coffee machine at the deli I worked at when I was seventeen, I've never brewed a cup of coffee. Somehow, I've made it through life without caffeine— no soda, no coffee, no tea. Normally, I feel pretty good about that, but when I needed to make the coffee for my pork chops, I all of sudden felt as though I was lacking an essential life skill.

Laura used to have a French press thingie (I think), but it got old and clogged, and then she decided she wasn't going to drink coffee anymore, threw it out and has not replaced it since. That means we had no coffee machine, no filters, no anything. So, I MacGyvered myself a cup of coffee using a paper towel and a funnel. It was totally ghetto and I'm sure it was a weak ass cup of coffee. However, since it wasn't for drinking, I thought it would be okay.

I put my coffee in a tupperware and added chopped ginger, garlic and parsley, apple cider vinegar, dijon mustard, dried thyme, salt and pepper. I stirred up the marinated, added two pork chops, and set it in the fridge for a couple of hours.

I pan-fried the pork chops and tried to reduce the sauce into a glaze in a separate pot. The chops were a bit too wet and didn't brown up the way I would have liked them to, and the sauce didn't ever get any thicker, which was a disappointment. The taste was good, but I think a longer marinading period would have produced a stronger, more pronounced coffee flavor. Also, I realized afterward that the original recipe probably meant dried ground ginger, which probably would have made a bit more sense. Otherwise, the ingredients made for a tasty marinade.

We served our pork chops alongside a fresh food co-op salad. We also had a particularly good batch of pesto for dinner. Nathan would like to take the credit, but I suspect that it may have something to do with the basil itself, which came from the food co-op and looked to be a slightly different variety than that I am used to.

All in all in was a good, tasty, satisfying dinner. Nothing fancy, but it did hit the spot on a Sunday evening.

Sunday, July 4, 2010

pasta with peas and broccoli rabe


pasta with peas and broccoli rabe

So, my first batch of peas, I pickled, and I liked them more than I expected. So, when week two of sugar snaps rolled around, I was feeling more generously towards the little legumes. (I just googled "are sugar snap peas legumes?" to be sure, and the results suggest they are. I apologize if I am mistaken; botany is not my strong suit.)

That Friday night I decided to make myself up a quick dinner before heading downtown to a party at my friend Becky's house, and I decided to make a dish that would honor the previously maligned pea, and my father's usual preparation of it. As I mentioned in my pickled pea post, my dad will often make a simple pasta dish with peas, onion and olive oil, and I usually try to get as few peas as possible. He also makes a similar dish with garlic and broccoli rabe. Since my second food co-op share included both of those veggies, I decided to combine the two ideas into one meal.

When I told Nathan of my plan, he got angry because "peas are the worst!" I tried to assure him that farm fresh peas were completely different from the frozen supermarket blandnesses he was used to, but he was adamant and kept saying "I can't believe you'd rather stay home and cook worsts instead of letting your boy take you out to dinner." I held my ground though, and was ultimately pretty happy with my decision. You'd be surprised how satisfying it is to get through even a small part of a weekly food co-op share.

I began by shelling the peas and setting the pasta water to boil. Then I sliced up an onion and cooked it in olive oil until it was very soft. After that, I added sliced garlic and the broccoli rabe, discarding the thickest stems. I cooked that over medium heat, stirring to keep the broccoli from burning. Then I added the peas and my secret ingredient: the olive oil and hot pepper flakes from an empty jar of anchovies. This fish infused oil gave it a little extra saltiness and richness, but the dish would obviously still work with regular oil and red pepper flakes. Once the pasta was al dente, I drained it and added it to the pan. I used campanelle, which is Italian for bell and is also a pretty cool pasta shape. I cooked it all together for a few minutes longer, and then ate it with plenty of grated parmesan. Delicious.

I realize now that I kind of screwed up with the peas. They were still delicious and fresh, and I should have cooked them up in the pods, rather than shelling them. They still tasted amazingly sweet and were crunchily delicious, but tossing the pods was definitely a waste. I've since made a similar dish with peas that stayed in the fridge for a few days longer, and by that point the pods had gotten nasty and wilty. While they were in their prime, however, they should be used. I won't make that mistake again.